Updated 30 September 2026
A well pump pressure switch turns the pump on at a low pressure point and off at a high one, typically 30/50 or 40/60 PSI. Rapid clicking usually means a waterlogged tank, a switch that will not cut in or cut out usually means the contacts are worn, and either problem that persists after a reset means it is time to replace the switch.
A well pump pressure switch is a small, inexpensive part that controls the entire system’s on and off cycle, and getting its adjustment wrong causes real damage. Pentair’s own adjustment instructions warn that a switch should never be set to cut on below 20 PSI or cut off above 60 PSI, limits built around what a standard residential pressure tank can safely handle.
The switch sits on the same electrical circuit as the pump motor, and home water systems represent a steady, year-round electrical load according to the Department of Energy, which is exactly why a switch stuck in the wrong position, cycling constantly, shows up fast on a power bill.
Most homeowners meet their pressure switch for the first time when something goes wrong: rapid clicking, a pump that will not start, or one that will not stop. Knowing which symptom points to an adjustment, a reset, or a full replacement saves a service call for a five-minute fix.
Common Well Pump Pressure Switch Challenges
Diagnosing the switch versus the tank is the first challenge. A waterlogged pressure tank and a failing switch both cause the pump to short-cycle, and testing the wrong part first wastes a repair trip.
This guide sits in our Wells & Pumps section alongside the pump lifespan guide and the replacement cost guide.
The second challenge is knowing when adjustment is enough and when the switch itself needs replacing. Worn contacts inside an old switch can look adjustable but still fail intermittently, even after a correct setting.
Working near a live electrical switch mounted next to plumbing is the third challenge, and it is the one that carries real risk if skipped in the wrong order.
Rapid Clicking: A Waterlogged Tank, Not the Switch
Rapid clicking, the pump starting and stopping every few seconds, almost always means the pressure tank has lost its air charge rather than a switch problem. A healthy tank holds a cushion of compressed air that lets the pump run in long cycles; once that air charge is gone, every small water draw triggers a full start and stop.
Check the tank’s air precharge with a standard tire gauge at the Schrader valve on top, with the tank fully drained of water and the pump off. Pentair’s chart sets tank precharge 2 PSI below the switch’s cut-on pressure, so a switch set to cut on at 30 PSI needs a 28 PSI precharge, and one set to cut on at 40 PSI needs 38 PSI.
Tank precharge pressure is not a rough guess, it follows a fixed relationship to the switch setting. Pentair’s own adjustment guide lists precharge at exactly 2 PSI under the cut-on pressure for every standard switch range, which is the number to test against, not an approximation.
Won’t Cut In: The Pump Never Starts
A pump that will not cut in, meaning it never starts even as pressure drops, usually points to a switch stuck in the off position or contacts too corroded to close. Tap the side of the switch gently while the pressure is low; if the pump starts immediately, the contacts are sticking and the switch needs replacing soon.
Before assuming the switch has failed, confirm the breaker is on and the switch has actual power reaching it. A tripped breaker looks identical to a dead switch from the pump’s perspective, and it is the faster thing to rule out first.
Won’t Cut Out: The Pump Never Stops
A pump that runs continuously and never cuts out is the more urgent problem, since it can run the tank past its safe pressure or burn out the motor. Shut off power immediately if pressure keeps climbing past the switch’s rated cut-off, rather than waiting to diagnose it live.
Pentair’s guide notes that cut-off pressure should always sit at least 5 PSI below dead-head pressure, the pressure the pump produces when the discharge is fully closed. A switch that will not cut out at all, with pressure climbing unchecked, has failed contacts and needs replacement, not adjustment.
Stuck Closed: The Diaphragm Never Feels the Pressure
A switch stuck closed is the other face of the won’t-cut-out problem, and it often is not the contacts at all. The small sensing tube under the switch clogs with sediment or iron scale, blinding the diaphragm so it never registers the pressure rise. Cut power at the breaker, then pull and inspect that tube and nipple; clearing or replacing it restores a switch that looked dead. If the contacts themselves are welded shut from arcing, replace the switch, it is a wear item, not something to file clean and reuse.
30/50 vs. 40/60: What the Numbers Mean
The two numbers on a pressure switch are the cut-in and cut-out pressure, and 30/50 or 40/60 are the two most common factory settings on residential systems. The pump starts (cuts in) at the first number and stops (cuts out) at the second, always keeping a 20 PSI gap between them on a standard switch.
| Setting | Cut-in | Cut-out | Tank precharge |
|---|---|---|---|
| 20/40 | 20 PSI | 40 PSI | 18 PSI |
| 30/50 | 30 PSI | 50 PSI | 28 PSI |
| 40/60 | 40 PSI | 60 PSI | 38 PSI |
Source: Pentair, Adjusting Well Pump Pressure Switches
A higher setting like 40/60 delivers stronger pressure at every fixture, which multi-story homes often prefer, but it also puts more strain on pipes, fixtures, and the pump itself. A 30/50 setting is standard for most single-story homes and puts less wear on the system over time.
How to Adjust a Well Pump Pressure Switch
- Cut power at the breaker. Never open a pressure switch cover with the circuit live. Confirm zero voltage with a non-contact voltage tester before touching any terminal.
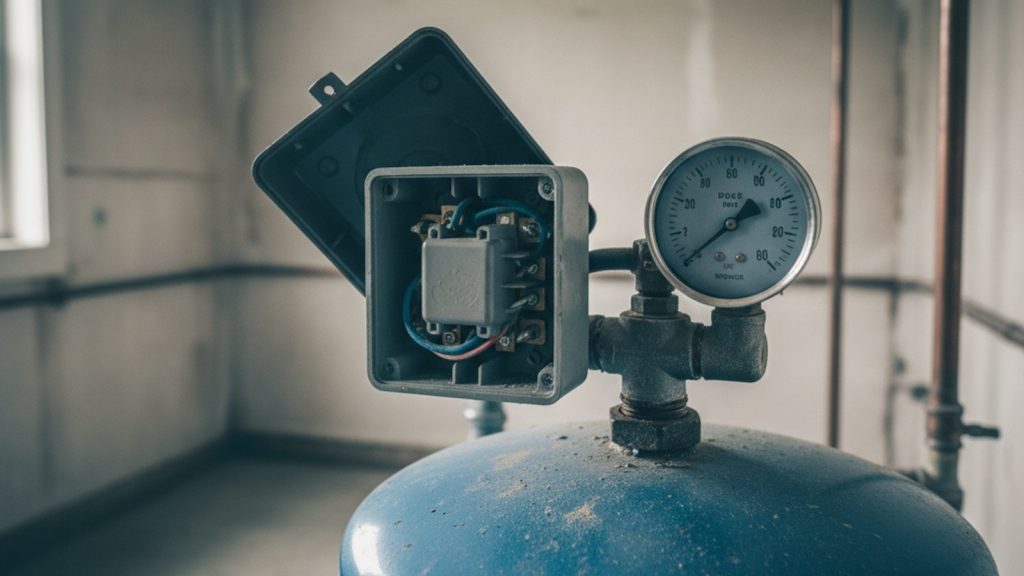
- Remove the switch cover. Loosen the retaining screw and lift the cover to expose the adjustment nuts.
- Identify the switch type. A single large nut is a one-post switch that adjusts cut-in and cut-out together. Two nuts mean a two-post switch, where nut #1 moves both settings together and nut #2 moves only the cut-out pressure.
- Turn the main nut to raise or lower pressure. Clockwise raises the pressure, counterclockwise lowers it, at roughly 2.5 PSI per full turn on most residential switches.
- Restore power and test. Turn the breaker back on, run a fixture to trigger a full cycle, and check cut-in and cut-out against a gauge before closing the cover.
A pressure switch carries live household voltage directly next to metal plumbing and standing water. Always cut power at the breaker, not just the switch, before removing the cover, and keep hands dry when working inside it. If the switch shows scorch marks or a burnt smell, replace it rather than adjusting it.
Resetting a Pressure Switch Without a Lever
Older or budget switches sometimes skip the manual reset lever found on newer models. On these, cut power at the breaker, wait about 30 seconds, then restore it; this clears a tripped internal overload the same way the lever does on switches that have one.
If the pump still will not restart after that power-cycle reset, the switch’s contacts have likely failed rather than simply tripped, and adjustment will not fix a failed contact.
Write the switch’s cut-in and cut-out numbers on the inside of the electrical panel door once you confirm them. The next time something seems off, you can check the actual gauge reading against the known setting in seconds.
Testing the Switch With a Multimeter
When tapping and resetting settle nothing, a multimeter gives a definitive answer in five minutes. Cut power at the breaker and confirm it is off with a non-contact voltage tester. With tank pressure drained below the cut-in point, set the meter to continuity and touch the probes to the two line-side contact terminals: a healthy switch reads near zero ohms, because low pressure holds the contacts closed. No continuity below cut-in means the contacts are burned or stuck open, and the switch needs replacement. If the contacts pass, restore power carefully and verify voltage is passing through to the load side when the switch is closed; power arriving on one side but not leaving the other confirms the switch has failed even though it looks intact.
How to Decide Between Adjusting, Resetting, or Replacing
Adjustment fixes a switch set to the wrong pressure for the household’s needs, nothing more. If the numbers are correct but cycling is still erratic, the problem is mechanical, not a setting.
A reset fixes a tripped overload on switches with that feature, restoring normal operation without touching the pressure setting at all. If the pump comes back and runs normally, the switch itself was fine.
Replacement is the answer once contacts are worn, corroded, or the switch will not hold a setting after adjustment. A pressure switch failing early in a pump’s expected life is also worth flagging, since it can point to short-cycling that is quietly wearing down the pump at the same time.
Rapid cycling is more often the pressure tank than the switch or the pump. Our pump failure signs guide covers how to tell the three apart before replacing anything.
If the switch is part of a larger system failure, replacing it alongside an aging pump is often more cost-effective than fixing each part separately as it fails. Well pump replacement cost breaks down what a full system replacement runs if the switch turns out to be the smaller part of a bigger problem.
Frequently Asked Questions (FAQs)
How do I adjust a pressure switch?
Cut power at the breaker, remove the switch cover, and turn the main adjustment nut clockwise to raise pressure or counterclockwise to lower it, at about 2.5 PSI per full turn. Restore power and test the cut-in and cut-out points against a gauge before closing the cover.
What PSI should well pressure be?
Most residential systems run 30/50 or 40/60 PSI, meaning the pump starts at the first number and stops at the second. A switch should never be set to cut in below 20 PSI or cut out above 60 PSI on a standard system.
How do I replace a pressure switch?
Cut power at the breaker, disconnect the wiring and plumbing fitting from the old switch, and install the replacement with a matching pressure rating and thread size. Restore power, test the cut-in and cut-out pressure, and adjust to match the household’s previous setting.
Why does my pressure switch keep clicking?
Rapid clicking almost always means the pressure tank has lost its air charge, not a switch failure. Check the tank’s precharge with a tire gauge at the Schrader valve; it should read 2 PSI below the switch’s cut-in setting.
How do I tell if it’s the switch or the pump?
Tap the side of the switch gently while pressure is low. If the pump starts immediately, the switch’s contacts are sticking and the switch is the problem, not the pump. If tapping does nothing and the breaker and wiring both check out, the fault is more likely in the pump or its wiring downstream of the switch.