Updated 30 September 2026
Shock chlorination of a well means mixing household bleach or HTH into the casing at a dose matched to well depth and casing diameter, circulating it through every fixture, letting it sit 12 to 24 hours, flushing the system, then retesting for bacteria 10 to 14 days later.
Bacterial contamination is common in private wells, not rare. A Penn State Extension survey of 450 private wells in Pennsylvania found that about 35 percent contained coliform bacteria, often from a one-time event such as a new pump installation or heavy surface runoff rather than an ongoing contamination source. Shock chlorination of a well is the standard response to that kind of positive test.
The dose has to match the well, not a rule of thumb. Ohio State University Extension publishes a bleach dosage table keyed to well depth and casing diameter, because a 6-inch casing and a 12-inch casing at the same depth hold very different volumes of water, and the chlorine dose has to scale with that volume to disinfect the whole column.
Homeowners searching for how to disinfect a well usually hit the same three walls: how much chlorine to actually use, how long the well has to sit before it is safe again, and how to confirm the treatment worked instead of just hoping it did. Getting any one of those wrong either wastes the effort or leaves the well undertreated.
How to Shock Chlorinate a Well: Step by Step
- Shut off the pump. Turn off the circuit breaker feeding the well pump before removing the well cap, so the pump cannot cycle while you are working near the casing.
- Measure well depth and casing diameter. Pull these numbers from a well completion report if you have one, or have a well contractor measure them. Both numbers set the dose in the table below.
- Look up the correct dose. Match the well’s water depth and casing diameter to the dosage table to find the right amount of household bleach or HTH (calcium hypochlorite) for the well itself, separate from what the plumbing needs.
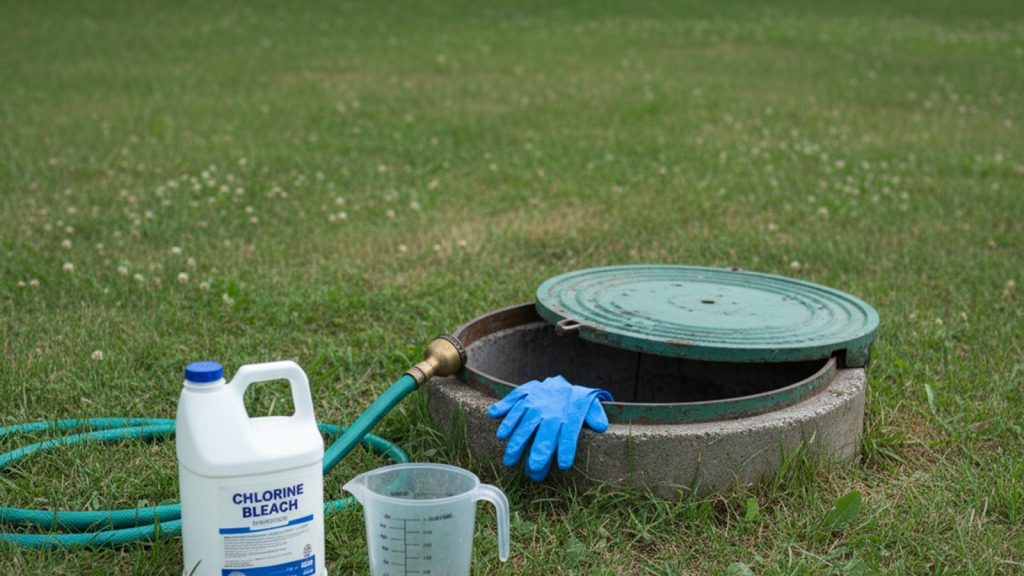
- Mix the solution. Dilute the bleach or HTH in a bucket of water before pouring it into the well; never pour concentrated chlorine straight down the casing.
- Add the solution and circulate. Pour the mixed solution into the casing, then run a hose from an outside spigot back into the well to rinse the interior walls and mix the chlorine through the column of water.
- Run every fixture until you smell chlorine. Open each indoor and outdoor faucet, plus the water heater, one at a time, until the chlorine odor is noticeable, then shut it off. This pulls the chlorinated water into every branch of the plumbing.
- Let it stand 12 to 24 hours. Leave the system undisturbed for the full contact time so the chlorine has time to reach and kill bacteria throughout the well and plumbing.
- Flush the system. Run an outside hose away from the septic system first, then flush indoor fixtures one at a time until the chlorine smell is gone.
- Retest for bacteria. Wait 10 to 14 days, then send a water sample to a certified lab to confirm the treatment worked before relying on the well again.
Chlorine dose scales directly with the water volume standing in the casing, which is why depth and diameter both matter. Coliform bacteria in well water is the contamination this process is built to remove, and the table below sets the dose by well size rather than a flat, one-size-fits-all measurement.
This guide sits in our Filtration & Treatment section alongside the full treatment overview and the UV purifier guide.
| Water depth | 4-inch casing | 6-inch casing | 8-inch casing | 10-inch casing | 12-inch casing |
|---|---|---|---|---|---|
| 10 ft | 1/2 cup bleach | 1 cup bleach | 1 1/2 cups bleach | 1 pint bleach | 2 pints bleach |
| 25 ft | 1 cup bleach | 1 pint bleach | 2 pints bleach | 3 pints bleach | 4 1/2 pints bleach |
| 50 ft | 1 pint bleach | 1 quart bleach | 2 quarts bleach | 3 quarts bleach | 1 gallon bleach |
| 100 ft | 1 quart bleach | 2 quarts bleach / 1/3 lb HTH | 1 gallon bleach / 3/4 lb HTH | 1 1/2 gallons bleach / 1 lb HTH | 2 gallons bleach / 1 1/2 lb HTH |
| 150 ft | 3 pints bleach / 1/4 lb HTH | 3 quarts bleach / 1/2 lb HTH | 1 1/2 gallons bleach / 1 lb HTH | 2 gallons bleach / 1 1/2 lb HTH | 3 gallons bleach / 4 lb HTH |
Household bleach here means plain, unscented 5.25 percent chlorine bleach, not a splashless or color-safe formula, which contains added surfactants that foam heavily in a well casing; HTH refers to calcium hypochlorite granules sold for pool and well disinfection. These figures cover the well itself and do not include the extra chlorine needed to disinfect connected plumbing, water heaters, and fixtures.
Never mix chlorine with ammonia or ammonia-based cleaners, since the combination forms a toxic gas. Wear safety glasses, rubber gloves, and a protective apron while handling concentrated bleach or HTH, and keep chlorinated discharge away from septic drain fields and any water treatment equipment. Bypass water softeners, carbon filters, and reverse osmosis units before starting, since concentrated chlorine can damage resin beds and membranes. Shut off electrical power to the pump before opening the well cap, and never drink or cook with water that still smells strongly of chlorine.
How Long After Shock Chlorination Can You Use Water Again?
Chlorine needs time to work, not just contact. Ohio State University Extension instructs homeowners to let the chlorinated water stand in the well and pipes for at least 12 and up to 24 hours before flushing. Pulling water out early cuts that contact time short and leaves bacteria that a full wait period would have killed.
During this window, avoid using any water in the house, including toilets, showers, and laundry. If the well serves more than one household, coordinate the timing so nobody draws water partway through the disinfection cycle.
When to Retest Your Well After Shock Chlorination
Retesting is not optional; it is the only way to know whether the treatment actually worked. Penn State Extension recommends retesting for total coliform bacteria 10 to 14 days after disinfection, then testing again two to three months later if the first result comes back clear. A clean first test alone does not confirm the problem is gone for good.
If bacteria return on either the 10-to-14-day test or the two-to-three-month follow-up, a single shock treatment has not solved the underlying issue, and a continuous disinfection system becomes the more realistic fix rather than repeating the same one-time treatment.
Challenges That Complicate a DIY Shock Chlorination
Underestimating well volume is the most common mistake: a rough guess at depth or diameter produces a chlorine dose too weak to disinfect the entire casing. Skipping fixtures is the second; a hose bib or a rarely used bathroom faucet left out of the circulation step leaves a pocket of untreated water in the system. Cutting the 12-to-24-hour contact time short is the third, and it undermines every step that came before it.
Shock chlorination is not a permanent fix for every well. A Penn State study of wells contaminated by coliform bacteria found that shock chlorination combined with a sanitary well cap successfully removed the bacteria for a full year in only 15 percent of the wells tested. The procedure worked best in wells with fewer than 10 coliform colonies per 100 mL and no E. coli present, meaning lightly contaminated wells respond far better than heavily contaminated ones.
Source: Penn State Extension, Shock Chlorination of Wells and Springs
That 15 percent figure is not a reason to skip shock chlorination; it is a reason to retest on schedule instead of assuming one treatment settled the question. A well that keeps testing positive after two properly executed treatments has a structural problem, a cracked casing, a failed seal, or a nearby contamination source, that needs a well contractor rather than a third round of chlorine.
A well that keeps testing positive after repeated treatment is a candidate for ongoing disinfection instead. Our UV water purifier guide covers sizing a continuous system to flow rate.
How to Know Your Well Is Safe to Use Again
A strong chlorine smell during circulation confirms the dose reached that fixture, but smell is not proof of safety. Only a lab result on a water sample taken after the full wait, flush, and retest schedule confirms the well is safe again. Treat that lab result as the final step, not an optional extra tacked onto the end.
A full walkthrough of well water cleaning covers what to do if bacteria return after a properly executed shock treatment, including when a continuous disinfection system replaces repeated one-time chlorination.
Frequently Asked Questions (FAQs)
What are the step-by-step shock chlorination steps?
Shut off the pump, measure well depth and casing diameter, mix the correct bleach or HTH dose from a dosage table, pour it into the well, and circulate it through every fixture until you smell chlorine. Let it stand 12 to 24 hours, flush the system, then retest for bacteria after 10 to 14 days.
When is shock chlorination needed?
Shock chlorination is needed after a positive coliform bacteria test, after a new well is drilled, or after any work that opens the well casing, including a new pump installation. It is a response to a specific event, not a routine maintenance task performed on a schedule.
How much chlorine do I add?
The correct dose depends on the well’s water depth and casing diameter; a 6-inch casing at 100 feet needs a different amount than a 12-inch casing at the same depth. Use a dosage table keyed to both measurements rather than a flat ratio, and add extra chlorine to disinfect connected plumbing separately.
When do I test after chlorination?
Retest for total coliform bacteria 10 to 14 days after disinfection. If that test comes back clear, test again two to three months later to confirm the result holds; bacteria returning on either test points to an ongoing problem rather than a one-time contamination event.
Does shock chlorination permanently fix bacteria problems?
Not always. A Penn State study found shock chlorination combined with a sanitary well cap kept a well bacteria-free for a full year in only 15 percent of contaminated wells tested. A well that stays positive after two properly executed treatments usually needs a structural inspection or a continuous disinfection system instead of repeated shock treatments.