Updated 30 September 2026
Clean well water through shock chlorination: mix household bleach into the well at a measured ratio, circulate it through every faucet and the water heater, let it sit for 12 to 24 hours, then flush the system and retest before drinking the water again.
Well water disinfection has a specific dose, not a guess. The University of Georgia Extension recommends 3 pints of bleach for every 100 gallons of water in the well, plus 3 extra pints to treat the household plumbing on the way through. Get the ratio wrong and you either waste chlorine or leave bacteria behind.
This disinfection guide sits in our Filtration & Treatment section alongside the full well water treatment overview and the UV purifier guide.
The CDC advises treating well water immediately if it contains harmful germs or chemicals, and switching to bottled water or another safe source until treatment is finished. Most homeowners only need this process, called shock chlorination, once in a while: after a new well is drilled, after flooding, after plumbing repairs, or when an annual test comes back positive for bacteria.
Knowing how to clean well water correctly means more than dumping bleach down the casing. The chlorine has to reach every foot of the well, the plumbing, and the water heater, sit long enough to kill what is there, and get flushed out completely before you drink the water again. Skip a step and you either short-change the disinfection or leave chlorinated water sitting in your pipes for weeks.
Disinfection solves bacteria, not sediment, iron, or hardness, if those also showed up on the test. Our well water treatment guide covers how to sequence the rest of the treatment train around it.
How to Shock Chlorinate a Well: Step by Step
- Turn off the pump. Shut off the circuit breaker feeding the well pump before you open the well cap. This prevents the pump from cycling while you are working near the casing and keeps you clear of moving parts.
- Calculate the well volume. Multiply the well’s depth of water by its diameter (using your well completion report or a rough measurement) to estimate gallons in the casing. This number sets your bleach dose.
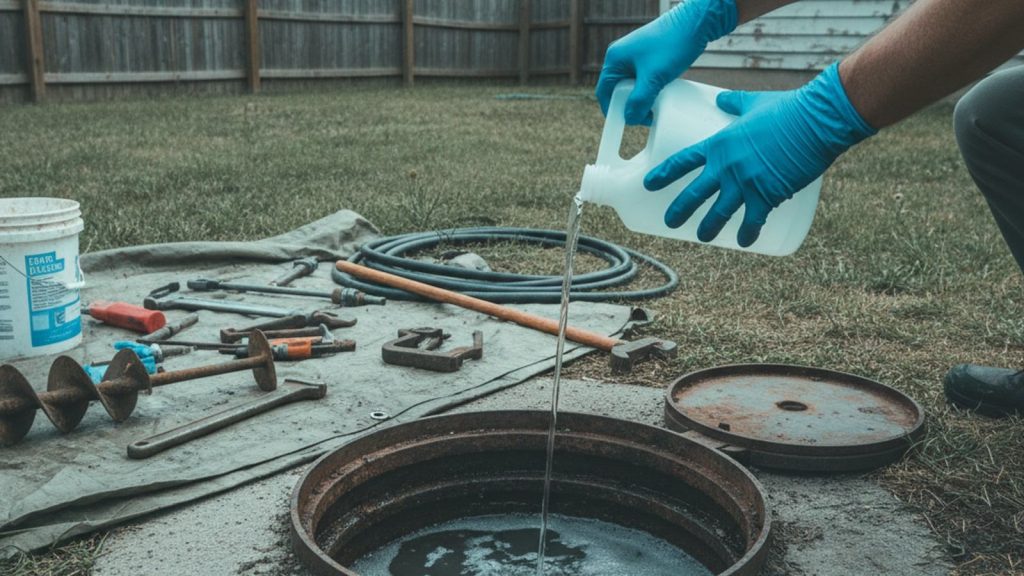
- Mix the bleach solution. Use unscented household bleach at 3 pints for every 100 gallons of water in the well, plus an additional 3 pints to disinfect the household plumbing. Mix the bleach with a few gallons of water in a bucket before pouring it into the well.
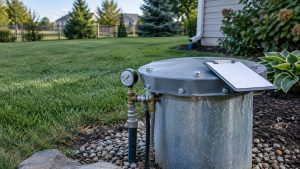
- Pour the solution into the well. Add the mixed bleach solution directly into the well casing, then run a garden hose from an outside spigot back into the well to circulate the chlorinated water and rinse the inside walls of the casing.
- Circulate through every fixture. Turn on each faucet, inside and outside, one at a time until you smell chlorine, then shut it off. Do the same for the water heater and any other connected fixture so the chlorine reaches the entire system, not just the well.
- Let it sit for 12 to 24 hours. Leave the chlorinated water standing in the well and plumbing for 12 to 24 hours, undisturbed, to give the chlorine time to kill bacteria throughout the system.
- Flush the system. Run outdoor faucets first to clear chlorinated water away from the septic system, keeping total discharge to septic under 100 gallons, then run indoor faucets until the chlorine smell disappears completely.
- Wait, then retest. Wait 5 to 7 days, discharging roughly 250 to 280 gallons of water each day, before collecting a new water sample. Retesting confirms the disinfection worked before you rely on the well again.
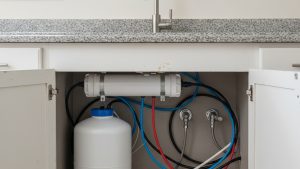
Concentrated chlorine solutions used for shock chlorination are dangerous to skin, eyes, and lungs. Wear goggles, a protective apron, and rubber gloves and boots while mixing and handling bleach, and never send more than 100 gallons of chlorinated discharge into a septic system in one session. Before you start, put any water softener, reverse osmosis system, or whole-house filter into bypass mode, since concentrated chlorine damages resin beds and RO membranes. Chlorinated discharge also harms the bacteria a septic system depends on, so route outdoor flushing to a non-vegetated area such as a gravel driveway, away from the drain field.
When to Shock Chlorinate vs. Routine Well Maintenance
Routine well maintenance and shock chlorination solve different problems. Routine care means an annual inspection of the well cap, casing, and visible plumbing, plus a yearly water test to catch contamination early. Shock chlorination is a targeted disinfection response, used after a specific event, not a maintenance habit you repeat on a schedule.
An annual inspection should cover the well cap seal, the visible casing for cracks or rust, the pitless adapter connection, and the area around the wellhead for standing water or erosion. None of that requires bleach. Shock chlorination only enters the picture when a test comes back positive, the well was recently opened for repairs, or floodwater reached the casing, situations where bacteria has a real, identifiable path into the system.
For a well that keeps testing positive after repeated shock treatments, continuous disinfection is often the more realistic fix. Our UV water purifier guide covers sizing and the pre-filter it needs to work.
Shock chlorination is not a recommended method for treating recurring bacteria problems. A well that keeps testing positive for bacteria after repeated shock treatments usually has a structural issue, a cracked casing, a failed seal, or a nearby contamination source, that needs a well contractor, not another round of bleach.
Source: University of Georgia Extension, Disinfecting Your Well Water: Shock Chlorination
Challenges That Trip Up First-Time Disinfection
Underestimating well volume is the most common mistake: guess low and the chlorine dose is too weak to reach every surface inside the casing. Skipping fixtures is the second: a hose bib or a rarely used bathroom faucet left out of the circulation step keeps a pocket of untreated water in the system. Rushing the wait time is the third; pulling water out too soon cuts the contact time short and undermines the whole process.
Ongoing prevention sometimes costs less than repeat treatment once a well keeps testing positive. Our well water filtration system cost guide prices continuous disinfection alongside the other equipment options by problem.
A strong chlorine smell lingering days after the flush usually means the flushing step stopped too early, not that anything is wrong with the treatment. Run each fixture longer, starting with the ones farthest from the well, until the smell fully clears. A metallic or slightly different taste right after shock chlorination is normal for a day or two as the system settles; it is the smell of chlorine, not a sign of failed disinfection, that should push you toward a longer flush.
Timing matters just as much as dosage. Shock chlorinate a well right after a positive bacteria test, after any repair that opened the casing, or after floodwater has surrounded the wellhead. Treating on a random schedule wastes bleach without addressing an actual risk.
Keep a copy of your well completion report with your dosage calculation. The next time you need to shock chlorinate, you will already have the well’s volume worked out instead of re-measuring from scratch.
How to Know Disinfection Actually Worked
A clear chlorine smell during circulation confirms the bleach reached that fixture, but smell alone does not confirm the well is safe again. The only reliable proof is a water sample sent to a certified lab after the flush and wait period are both complete. Treat the retest as the final step of the process, not an optional extra.
Coliform bacteria, including E. coli, that persist after two properly executed shock treatments point to a structural problem with the well itself rather than a dosing error. At that point, a licensed well contractor needs to inspect the casing, seal, and screen before another round of chlorine does any good.
Well water testing after every shock chlorination closes the loop: it is the only way to know the bacteria are actually gone instead of just less concentrated than before.
Frequently Asked Questions (FAQs)
How do I disinfect my well?
Shut off the pump, calculate the well’s water volume, and mix household bleach at 3 pints per 100 gallons of water in the well plus 3 extra pints for the plumbing. Circulate the solution through every fixture until you smell chlorine, let it sit for 12 to 24 hours, then flush and retest.
What does shock chlorination do?
Shock chlorination floods the well, casing, and household plumbing with a strong chlorine solution to kill bacteria and other microorganisms in one treatment. It is used after new well construction, flooding, plumbing repairs, or a positive bacteria test, not as routine upkeep.
How often do I clean my well?
There is no fixed schedule for shock chlorination; it is a response to a specific event rather than a routine task. Test your well water annually, and shock chlorinate only after a positive bacteria result, new construction, a repair, or flooding around the wellhead.
Is shock chlorination safe?
Shock chlorination is safe when done with the right protective gear: goggles, gloves, and a protective apron while handling concentrated bleach. Keep discharge to a septic system under 100 gallons, and stay out of the treated water until the flush and wait period are complete.
Will shock chlorination fix a rotten egg smell?
Shock chlorination kills the sulfur-reducing bacteria that cause a rotten egg smell, and most wells see the odor clear within a day or two after the flush. If the smell returns within weeks, the bacteria colony has re-established in the plumbing or water heater, and repeat treatment or a continuous chlorination system is the fix, not a stronger single dose.